
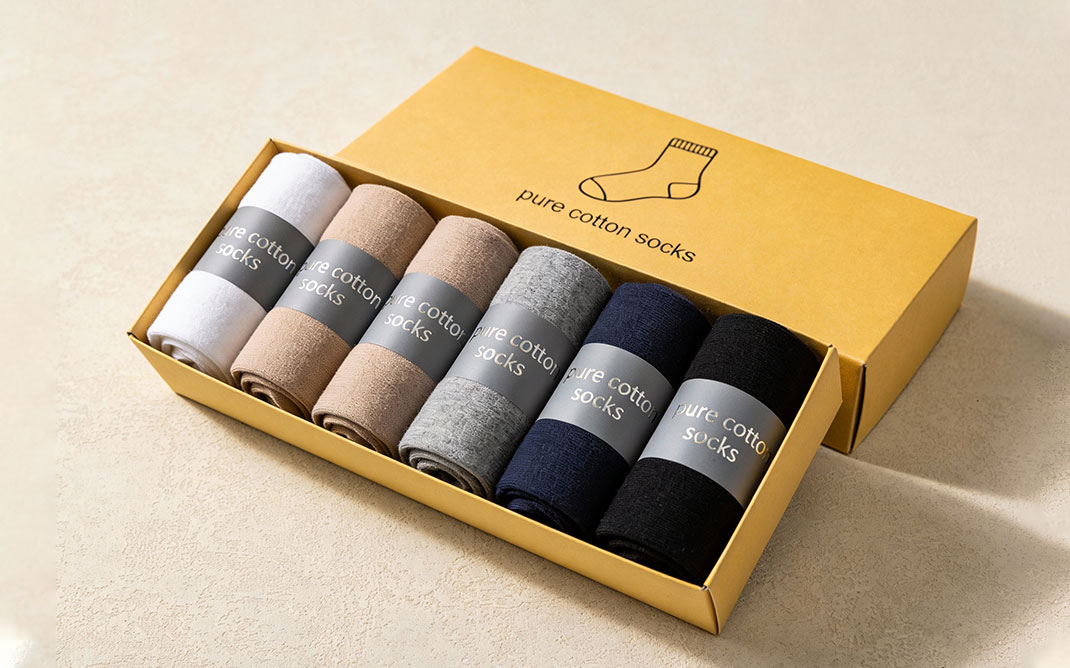
When a brand orders a box for a multi-pair sock set, the first decision should be the packed arrangement—not the outside dimensions of an attractive sample. Rolled pairs, flat-folded pairs, paper bands and small tags take up space in different ways. A useful packaging brief describes the complete set as it will actually be presented, so the brand, packer and box supplier can evaluate the same configuration.
This guide focuses on the decisions to settle before approving a sample for a sock gift set. It is not a universal box specification: the final clearances, construction and packing method should be checked against the buyer’s own products.
1. Define the assortment that will go into every box
Begin with the intended number of pairs and the way each pair will be presented. Specify whether the socks are rolled, folded flat, paired with a printed band, wrapped individually or grouped by color. If the set includes different sizes or styles, identify which versions will be included in the first sample.
A photograph of the assortment is useful, but add a written packing sequence. For example, indicate whether the darkest color belongs at one end, whether the logo on each band should face upward and whether any extra card is placed under the socks. That sequence helps the supplier understand why a proposed internal layout matters.
2. Measure the packed unit, including bands and tags
Measure several complete sets after using the intended folding or rolling method. Record their length, width and height, rather than relying on garment measurements alone. Note the largest realistic packed combination and any differences between a freshly rolled pair and a pair that has been handled or placed in the carton.
Provide the usable internal dimensions requested for the box and indicate the direction in which the socks will be loaded. Lid overlap, folded panels and optional supports can reduce usable room. Instead of choosing a universal allowance, test the proposed clearance with actual packed sets. If the fit is tight, adjust the packing method or drawing before approving decoration.
3. Choose a visible arrangement, not just a capacity
A single row of rolls can show every pair at once, while a layered presentation may place some pieces below others. Neither arrangement should be selected from photographs alone. Ask the packing team to load the chosen assortment and confirm how it looks when the lid is opened by the customer.
Consider the intended first view: Are the colors in the right order? Do the paper bands face the same way? Is the main label visible without moving a pair? These questions affect the customer’s experience, but they also affect the time and consistency of the packing process.
4. Test access, lid movement and removable accessories
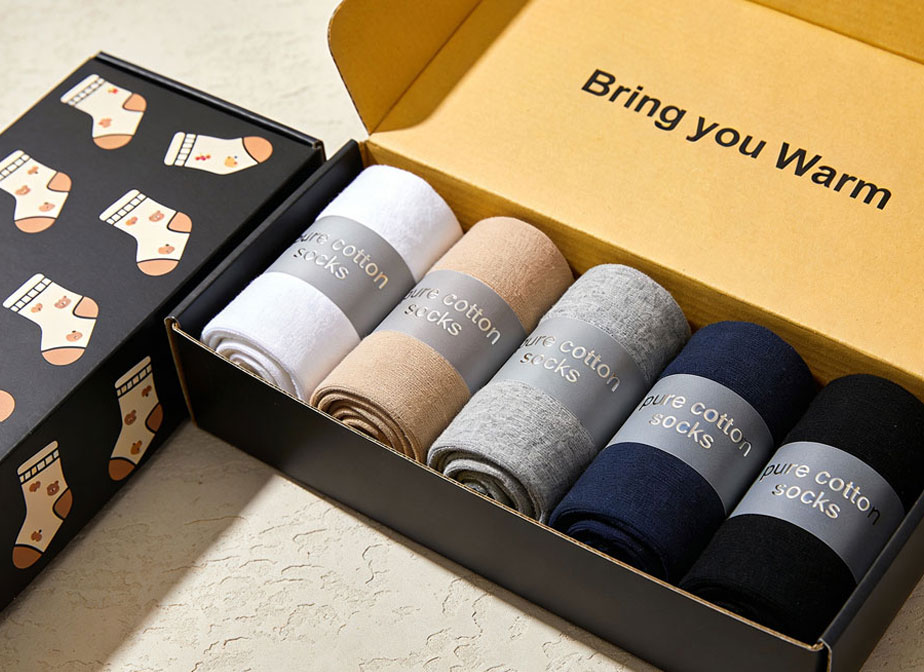
Check the box while it is fully packed. A separate lid should lift without pulling a tag or paper band out of place; a hinged cover should open without disturbing the nearest pair. Ask someone who was not involved in the design to remove one pair and replace it. Their observations can reveal awkward access that a flat dieline cannot show.
If a divider, retaining frame or loose insert is proposed, list it as a separate component in the specification. Confirm whether it is included in the quoted packaging scope and how it will be fitted. Do not assume that the visible outer carton proves anything about transport protection; parcel distribution and any protective outer pack require their own assessment.
5. Review artwork with the actual opening direction
Mark the front edge, opening direction and intended display orientation on the artwork proof. The lid design may look balanced in a flat file but read differently when the box is open beside the product. Check the position of the logo, any inside-lid message and the printed bands together with the packed sample.
If more than one size of gift set will share a design, review each format separately. Matching artwork does not guarantee the same fit or placement. Keep the drawing revision and artwork version together so the supplier knows exactly which physical sample represents the approved design.
6. Use one approval sheet for the brand and packing team
Sample approval is clearer when it records what was actually checked. Include the pair count, representative sock sizes, packing orientation, internal dimensions, lid action, band placement, insert components and artwork revision. Photograph the loaded sample both open and closed, with a reference to the drawing version.
Record changes as specific actions: which location needs clearance, which band should rotate or which lid edge should be adjusted. If the assortment changes later, revisit fit before repeating an order. A successful presentation check should not be described as a shipping-performance test or a blanket approval for different product combinations.
7. Prepare a quotation request that avoids assumptions
- Provide the intended pair count, size range and a real packed reference set.
- Share internal size targets and a sketch showing the chosen roll or fold orientation.
- Identify the lid style, any required supports and all bands, cards or tags inside.
- Include the current artwork file and mark the opening and display directions.
- State what the physical sample must confirm before the production specification is accepted.
For an example of this product family, review the Multi-Pair Sock Box. To request an assessment of a specific assortment, use the HC Packaging contact form with the packed dimensions, quantity and layout requirements. These links are product and inquiry references; the final specification must come from the actual set and approved sample.